![]() Chartist by Novagraph. Flowchart and Organization Chart Software
Chartist by Novagraph. Flowchart and Organization Chart Software
Chartist Tour - Adding Lines
Previous: Tour Chartist - Add Text To
Symbols
Next: Tour Chartist - Saving
Documents
One of the important useful features of Chartist is how it handles lines. Lines connect symbols. In Chartist you designate the place where a line begins, and where it ends. Chartist then does the rest. It connects the symbols with the line in the manner that you designate. If you move or change the symbols, it automatically maintains any connecting lines.
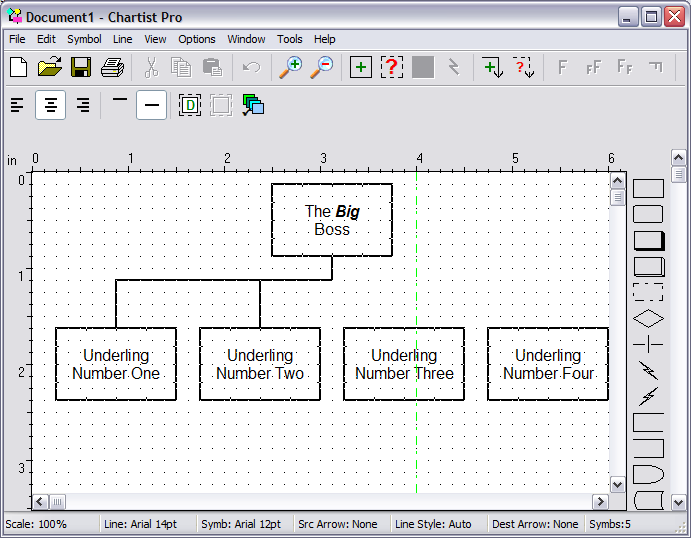
Let us continue with the simple example that we started. Here we have added a few more symbols and are ready to connect things up to form a typical hierarchical organization chart:

Above, you see the five boxes ready for lines. Do you notice the little tick marks along the borders of the rectangles? In this case there are 3 of them on each side of each symbol. These are the line attach points. For these symbols the line attach points are where you can connect lines. These points only show up on the display as (yet another) visual aid. When you print the document (or otherwise use the picture) you don't see the line attach points. The number of line attach points per side can be set at 1, 3, or 7 points per side. You can also turn the viewing of these points on or off in the View Menu.
Now, let's connect a line from The Big Boss box to Underling Number One box. To add a line you can use the Line Add menu command, or even quicker you can use the mouse and the right button. Here is how:
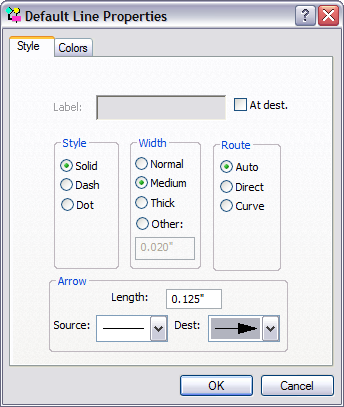
But first, we need to set the Default Line Properties to draw the kind of lines we want. We want Auto style lines, with no arrows on either end. So, we choose the Line Properties... command (with no lines selected) to set up the defaults:
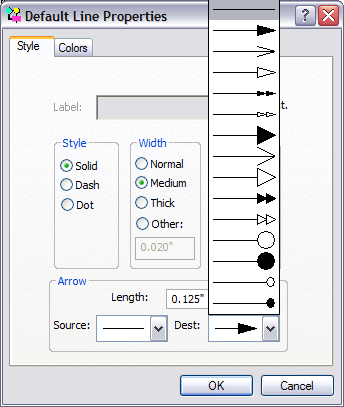
What we need to do is scroll down the Dest combo box and find the plain (no arrow) line terminator. After selecting it, we click OK to set the new default:
That being done, we are ready to add the lines we need.
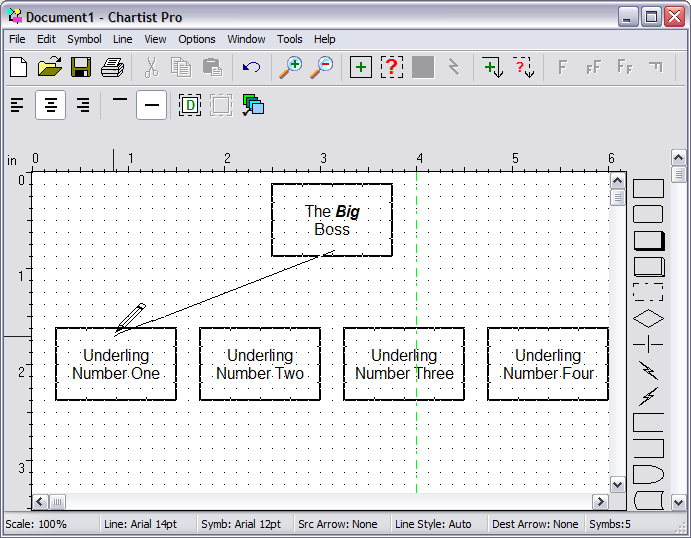
1. Put the mouse cursor onto the bottom center tick mark of The Big Boss box, and hold down the right mouse button.
2. The mouse cursor will turn into a pencil shape. Drag the mouse over to the top center tick mark of the Underling Number One box. A straight line will follow the mouse stretching as you move to the end point.
Don't panic! This straight line is not how the line is going to look when you are done. It is yet another visual aid, giving you an animated indication of which two boxes you are connecting.
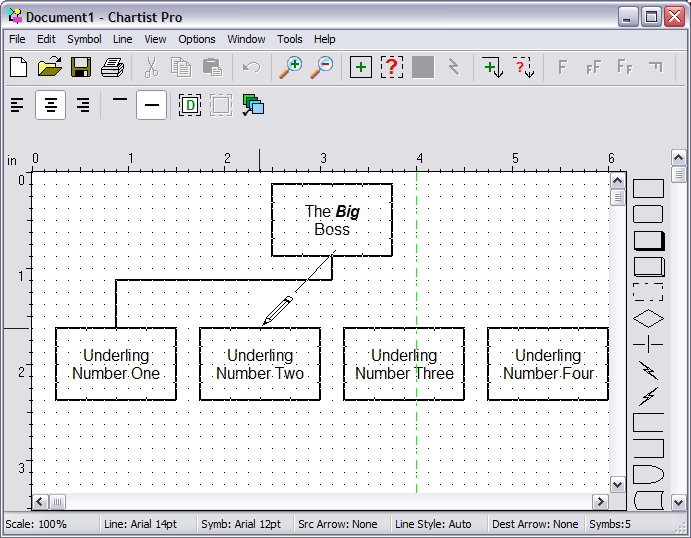
When you release the right mouse button, the Line Add function will be completed, and the line will be routed and drawn according to its style settings:

You can see where we are going with this. We are going to add three more lines, each exiting The Big Boss box, and entering in turn the other three boxes.
Important: A lot of new users complicate their lives unnecessarily with this type of drawing. They want to make a horizontal line that extends left to right between the top and bottom boxes, and then connect little vertical lines from the boxes to the horizontal line. This is far too much work. Chartist will do all the work for you if you will let it!.
If you connect the top box to each of of the four other boxes in turn, Chartist will handle everything, and you will end up with a better drawing for later editing. This is in fact the logical way these entities are connected, and Chartist handles that quite easily.
So, continuing:
By letting Chartist do the routing work, you are saving a lot of time and effort:
And finally:

Try drawing a little diagram like this one. Then try moving things around to see how quickly Chartist manages the line routing.
Chartist routes lines using a few very predictable rules. You will quickly learn how it treats each situation, and then you will be able to make better use of its features.
You can also draw lines that are straight (diagonal in general) or curved (bezier). Experiment a little, and you will get the "hang" of things.
Back to
Tour
Previous: Tour Chartist - Add Text To
Symbols
Next: Tour Chartist - Saving
Documents
![]() Site Map | Privacy Policy | Contact Us | ©:2020 Novagraph
Site Map | Privacy Policy | Contact Us | ©:2020 Novagraph