![]() Chartist by Novagraph. Flowchart and Organization Chart Software
Chartist by Novagraph. Flowchart and Organization Chart Software
Chartist Tour - Printing Documents
Previous: Tour Chartist - Saving
Documents
Next: Tour Chartist - Using
Chartist Diagrams in Other Applications
Printing Chartist documents is also pretty easy. There are a few things about how Chartist treats documents, you need to understand.
In Chartist a document can contain one or many pages.
Chartist cares more about the overall size of a chart document, than the paper you are using in your printer. In the Options Chart... dialog, you set, among other things the overall size of the chart you are using.
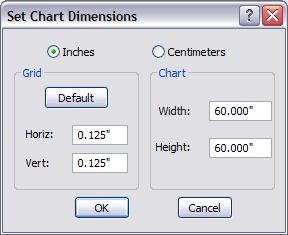
In this case the Chart Dimensions are set at 60 inches by 60 inches.
When you look at the Chartist Window, you will see an overall chart size of 60 inches square, and there will be several page boundaries marked off with solid green lines. The following illustration shows our sample document zoomed out to 25% scale, and you can see parts of 6 physical pages:
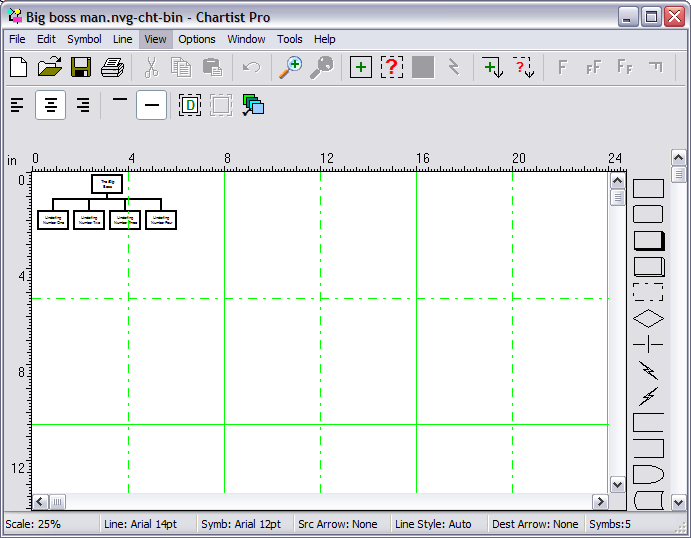
The only page with material on it is the top left one. If you were to print this document, only that first page will print.
Chartist normally prints the fewest pages it can that contain information. More specifically, under a normal print operation, it will print the smallest rectangle bounding the information in the chart.
You can use this behavior any way you like. You set up a large document, and treat the individial physical pages as separate unrelated entities. Or, you can use the drawing field without regard to the page boundaries. In the second case, if you print the entire chart normally, you will have to lay out the pages side by side to see the entire drawing.
To set the printer, paper size and margins, use the File Setup Printer and Paper... dialog.

Chartist remembers these settings from one session to the next, and the settings are also stored with the document.
To Print, use the File Print... dialog, or click on the Print Tool Button:
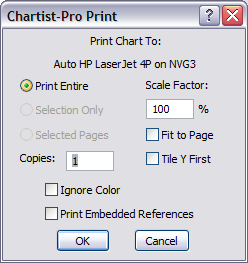
Some of the options include:
1. Fit To Page - Will make the whole document fit centered on one piece of paper.
2. Scale Factor - Dial in your own scale factor.
3. Tile Y First - Changes the order of printing pages, prints down first then across, versus the default, across, then down.
4. Selection Only - If symbols are selected, just print those (and any lines between them).
5. Selected Pages - If symbols are selected, just print the physical pages that have selected symbols on them.
Back to
Tour
Previous: Tour Chartist - Saving
Documents
Next: Tour Chartist - Using
Chartist Diagrams in Other Applications
![]() Site Map | Privacy Policy | Contact Us | ©:2020 Novagraph
Site Map | Privacy Policy | Contact Us | ©:2020 Novagraph